XAUUSD Supply & Demand Analysis: Complete Trading Guide
Trading gold successfully requires strategy, precision, and a strong understanding of market behavior. XAUUSD Supply & Demand Analysis is one of the most reliable methods for predicting price movements and identifying high-probability trade setups. In this guide, we will explain how to spot supply and demand zones, interpret market behavior, and use these insights to maximize profitability in XAUUSD trading.
By following these steps, traders can incorporate Supply & Demand Analysis into their XAUUSD strategy while avoiding common mistakes.
Understanding Supply & Demand in Forex Trading
At its core, trading is driven by the basic economic principle of supply and demand. Therefore, when demand exceeds supply, prices tend to rise. Conversely, when supply exceeds demand, prices fall.
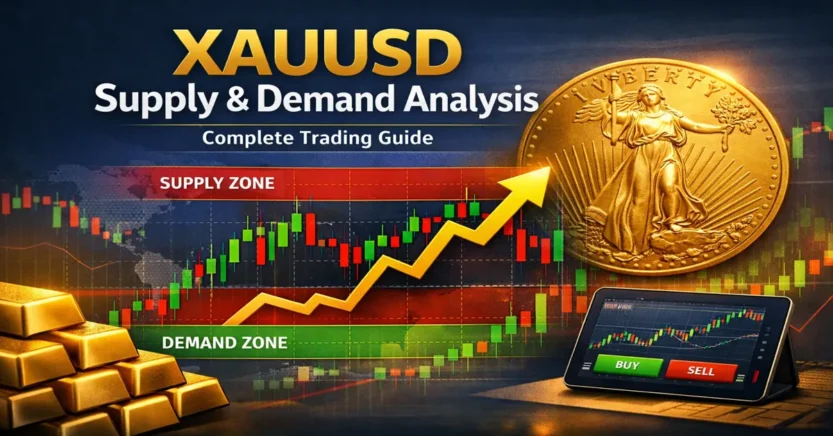
In XAUUSD, supply zones are areas where sellers dominate, often causing price reversals, while demand zones are areas where buyers push prices higher. Moreover, these zones are closely monitored by professional traders because they reveal high-probability trading opportunities.
Why Supply & Demand Zones Matter in XAUUSD Analysis
XAUUSD is heavily influenced by global events, economic news, and investor sentiment. Unlike most currency pairs, gold reacts sharply to inflation reports, geopolitical tensions, and central bank policies. Consequently, identifying Supply and Demand Zones helps traders anticipate where price may reverse or stall.
By identifying Supply and Demand Zones, traders can:
- Spot high-probability trade setups
- Avoid false breakouts
- Manage risk effectively
- Optimize entries and exits
In other words, these zones act as a roadmap, guiding traders through the volatility of gold markets.
How to Identify Supply Zones in XAUUSD
A supply zone is essentially a price area where sellers are likely to step in. Identifying supply zones involves looking for areas where price previously rejected upward movement and dropped sharply.
Here are the key steps:
- Look for Strong Bearish Candles
Identify areas where a large bearish candle has formed, which indicates strong selling pressure. - Mark Previous Swing Highs
Supply zones often originate around prior swing highs where price stalled before reversing. - Confirm with Volume
High selling volume in these areas strengthens the validity of a supply zone. - Observe Multiple Touches
Zones that have caused price reversals multiple times are generally more significant and reliable.
Remember, supply zones are not single price points but price ranges. This flexibility allows traders to place entries slightly within or near the zone for better execution.
How to Identify Demand Zones in XAUUSD
Similarly, demand zones are areas where buyers have previously overpowered sellers, pushing prices higher. To identify demand zones:
- Look for Strong Bullish Candles
Large bullish candles indicate heavy buying and often form the base of a demand zone. - Mark Previous Swing Lows
Prior areas of consolidation or reversal often act as demand zones. - Confirm with Volume
Areas with increased buying volume confirm strong interest from buyers. - Observe Reaction Points
Price bouncing multiple times from the same zone confirms its strength.
Therefore, by carefully marking demand zones, traders can enter positions at optimal points, reducing risk and increasing reward potential.
Step-by-Step Process to Draw Supply and Demand Zones
Correctly drawing these zones is essential. First, switch to higher time frames like H4 or Daily charts to identify significant zones.
Next, identify swing highs and lows, focusing on strong price reactions where the market reversed sharply. Then, draw zones around the candlestick bodies rather than wicks, as the body often reflects the real market interest.
Additionally, confirm zones using multiple time frames. Lower timeframes like H1 can help refine entry points. Finally, adjust zones slightly to account for market noise and false breakouts.
By following these steps, your supply and demand zones will be precise, actionable, and effective.
How to Trade XAUUSD Using Supply and Demand Zones
Trading gold using supply and demand zones involves patience and discipline. Here’s a practical approach:
- Buy at Demand Zones
Enter a long position when the price approaches a validated demand zone. - Sell at Supply Zones
Enter a short position when the price nears a confirmed supply zone. - Set Stop Loss and Take Profit
Place stop-loss slightly beyond the zone to protect against false breakouts, and target profits at the next zone or key Fibonacci levels. - Use Confirmation Signals
Combine with candlestick patterns, RSI, or moving averages to increase probability. - Monitor News Events
Gold reacts to economic data; therefore, your zone trading strategy should account for volatility spikes.
As a result, trades based on validated zones tend to have higher success rates than random entries.
Learn more about XAUUSD Trading Strategies
Common Mistakes to Avoid in Supply and Demand Trading
Even experienced traders make mistakes. For example, ignoring zone strength can lead to poor trade outcomes. Not all zones are equal; higher timeframe zones carry more weight.
Furthermore, trading without confirmation signals or overtrading can increase losses. Patience is key, wait for the price to approach the zone and show signs of reversal.
Additionally, neglecting risk management is dangerous. Always calculate position size relative to your account and set stop-loss orders. Lastly, trading against a strong trend often leads to repeated losses; zones are more reliable when aligned with the overall trend.
Advanced Tips for XAUUSD Supply and Demand Analysis
To refine your strategy, consider these advanced tips:
- Combine with Market Structure
Zones aligned with trend structure increase trade reliability. - Watch for Break and Retest
A broken supply or demand zone may act as a new demand or supply zone after a retest. - Use Volume Profile Analysis
Volume clusters can highlight stronger zones that price respects. - Integrate Fibonacci Levels
Support and resistance levels from Fibonacci retracement often coincide with supply and demand zones.
By using these advanced techniques, traders can significantly improve their probability of success.
Why Supply & Demand Zones Beat Traditional Support and Resistance
Unlike static support and resistance lines, supply and demand zones are dynamic and probabilistic, reflecting real market psychology. They account for institutional orders, market reactions to news, and areas of price imbalance.
Consequently, these zones often lead to higher-probability trades compared to traditional horizontal lines.
Conclusion
Mastering Supply and Demand Zones in XAUUSD Analysis is an essential skill for traders seeking consistency and profitability. By understanding how to identify and trade these zones, monitoring volume, and combining them with market structure, you can navigate gold markets confidently.
Remember, patience, discipline, and continuous learning are key. Therefore, always test your strategies in a demo environment before committing real capital. With practice, Supply and Demand analysis can transform your XAUUSD trading into a precise and profitable system.
For additional technical analysis methods, see Investopedia